Showing posts with label Golf. Show all posts

Thursday, August 21, 2025

Rear wheel bearings, and a new heater blower

 Getting through perhaps the past state inspection- needed rear wheel bearings.  Actually a pretty easy job in the end.  Hardest part is getting the brake pads reinstalled correctly!  Bonus, now have new hubs on the rear which will allow a new screw to secure the brake discs- no more having to mess around to align the lug-bolt holes

 Bonus, the heater blower resistor-pack has been blowing fuese, which means the blower motor is dying and drawing too much current.  Replaced that today as well.  

Saturday, January 21, 2023

Oil, filter change, Golf

 nothing special here, just noting the change today, at 252,694 miles.  Starting to wonder if the PCV valve might need changing...

Wednesday, September 1, 2021

Getting through inspections... Sway-bar end link on the honda, new brakes on the Golf, a CV boot, and some welding on the exhaust!

I didn't take too many pics of any of this work in part because of all of the great youtube videos and such out there- there are much better resources to find out how to do these things! But this year to get through inspection I had to: 

 On the Honda- broken sway-bar end link in the rear. Had to chop the rusty bolts off since they were just spinning in the ball joints but otherwise an unremarkable job. 

On the Golf: I knew I needed e-brake cables (those cables have been bad/binding for years but I've just struggled along with it) before the inspection. So I did those, and then literally on the way to the inspection the ABS light went on. Vag-Com tells me it's likely a bad sensor on the right rear. 

Ok. So wait a few days for mail-order parts and then dive into it. Turns out it is way more of a pain than it should be- the existing sensors have to be driven out with a hammer and punch, completely obliterating them in the process. Then the new sensors have to be practically pressed (hammered) in- for me with the assistance of vise-grips as an on-the-car press. Along the way I figured it made sense to do the rear brakes 'cause it seems like I alwways have to and I had them all off anyway. 

The front brakes _looked_ fine... but on inspection the rotors were too scored, even though I had plenty of pad left.. ah well, might as well refresh brakes all around. 

Also the CV boot on the right side had a small hole in it and was throwing grease all around. I would have been happier not to have to remove the CV joint but I've done most of it enough times now that it wasn't too dramatic (once I had all of the parts which was a bit of a saga that I won't recount here). Most surprising is how the CV joint comes off the half-shaft with just a little spring clip. 

Finally, not sure this would have been a failure point but I noticed my rear-most exhaust hanger was rusted out and broken. So I fabricated a new one- and for this I have photos!

I'm glad I got a TIG welder- much easier to make a decent weld on the car than using my acetelyne torch...

Tuesday, March 23, 2021

Oil & filter change, Golf

 247 k miles, time to change the oil and filter in the Golf.  No pics, this is just an entry to log that it was done! 

Saturday, August 29, 2020

... and rear brakes again

 Rear brakes failed inspection.  New parts from autozone, rotors and pads.  Seems the lower slide pins on both sides had also seized...  so freed them up and lubricated, rewound the pistons using that brake rewind tool, and put 'em back together.  Next time, just grab new slide pins from the parts store too!  Mileage, about 245k.  

Saturday, August 22, 2020

Passenger side CV axle...

 Sorry no photos.  This is more for my own documentation...  

245,000 miles.  Symptoms essentially showed wear in probably the inner right CV joint.  Replaced with DSP axle from ESC tuning.  First accidentally ordered one for an auto trans, obviously didn't fit.  Also sheared off the ball joint bolts, so had to get new hardware from ECS as well.  

After a long wait for shipping, all is back together today.  

Sunday, May 3, 2020

Thermostat on the 2003 Golf

Golf had been running cool for a couple of months actually...  suspected a thermostat stuck-open.  Finally replaced it.  It was a pain to drain the coolant (especially since there was a bunch trapped behind the thermostat, so even after "draining" there was more to come when I pulled it out, and thus spilled some to the floor)...  but other than that the job went off without a hitch.  Pretty quick.  

And now the temp gauge swings right up to 190 and sits there perfectly.  Wish I'd done it sooner!

Saturday, June 22, 2019

Exhaust repair- again...

So, about 2 years ago I had to do some welding on the Golf exhaust...  Turns out those welds lasted 2 years!  One of them has now rusted through:


The good news is that now I have found a replacement pipe for $199 online, as opposed to the $800 I was looking at 2 years ago...  (not sure how that works).  Installed today with no troubles.

Also changed the oil and filter today.

Friday, March 29, 2019

Broken Spring!

So, a week ago Suzanne was driving the Golf along and heard an alarming "Sproing!!" from the front passenger's side.  I jacked it up and sure enough, about 3 inches had broken off of the coil spring on the strut.  And actually, once I got into the job, I discovered another 2 or 3 inches of spring, so 5-6 inches had broken off in total.  Not dangerous but definitely disconcerting. 

So I replaced the struts.  not much more expensive than only replacing the springs, and "easier" since one doesn't have to get the spring compressors out, deal with heavily loaded coil springs and such. 

However, I should have gotten the spring compressors out, as the struts have only so much clearance.  Technically it's only 2 bolts, but after you've removed the brake caliper, disconnected the sway-bar end link, disconnected the passenger's side driveshaft (for which you had to remove the skid plate, at which point you discovered 2 spinning rivnuts and had to grind off the bolts with an angle grinder)... 

It's more than 2 bolts.  But in hindsight, I could probably have gotten the clearance I needed by compressing the strut! 

Ah, live and learn.  And write it down so that next time you don't have to learn it all over again!

Friday, December 21, 2018

When it rains it pours... Rear brakes on the VW

So, Just before I left for the AGU meeting for a week, the rear brakes on the Golf started to let it be known that there was NO PAD LEFT.  Yes, metal-on-metal.  Surprised me that the pads wore out so fast.  But then the rear brakes had been dragging a bit so I should have been more watchful.

In any case, nothing like a job that has to be done right away.  Down to the parts store, picked up some ceramic pads this time for longer life, and some upgraded rotors for a few bucks more...  And of course the 'borrow' brake rewind tool.

And then what should have been a 1-hour job became epic.  Why?  First, unbeknownst to me, the brake rewind tool was broken in a subtle way.  On these rear brakes, the piston must be rotated clockwise as it's pressed back into the caliper- so an ordinary c-clamp wouldn't do the job, and this tool has special pawls to grab the piston and rotate it as it presses.  But the pin on the shaft that forces the rotation was sheared off inside, so it wasn't rotating.  All I knew was that no matter how much force I used, the pistons would not go back in.  And just about hour 2 trying to do this, in spite of the fact that I'd dutifully hung the calipers on 'coat hanger' wire to keep any strain from the brake hose, the hose broke on the RH caliper right where it attaches to the caliper.  And, of course, it's a pre-bent hard-line grafted to the flexible hose (no fitting, just crimped on), so not available at the parts store- special order.

So, order the parts (and rebuild kits for the calipers, since I've got them off, I might as well and that will hopefully eliminate the dragging).  Then borrow a car for the week and go to the meeting.

It wasn't until I tried putting the calipers back together that I discovered the problem with the tool.  But the parts store gladly exchanged it and, after some significant effort getting the pistons back in past the new rubber seals, it was back to the 1-hour job it was supposed to be.

All this to say:  new rotors, pads, and rebuilt calipers on the golf.  And a newly-borrowed Honda CR-V which might just become a third rig in the stable, while the Trooper's laid up.  Sorry no photos on this one, but the job was more of a "get it done so the car can be back on the road" kind of thing.

Tuesday, June 12, 2018

Front brake shudder

Front brakes have been shuddering and I don't know why...  got under there today to check it out and currently I think the rotors are warped - but I put new ones in just a couple of years ago...

I now suspect seized slide pins; creating caliper drag on one side only.  Remedy- replace slide pins, new rotors and pads.  Also really clean up the hub surface to make _absolutely_ sure the rotor is normal to the bearing axis.  Should do it.  Ordering parts today!

Saturday, November 11, 2017

If you're going to do the wheel bearing on one side….

You'd better do the other side too.

For the last month or so the passenger side rear wheel bearing has been singing- though shrieking would be more appropriate for the past week…

Changed it out today.  Sweet silence driving down the road!

Noticed the brake discs are a bit worn- probably time to do those soon as well.  Never ends!

Thursday, August 24, 2017

Getting through inspection: Golf check engine light, headlights, wheel bearing...


No pics from this round, as I did it in a bit of a hurry.  Golf failed inspection on three counts- bad rear wheel bearing (I knew it needed to be done but thought it would last a bit longer), headlight lenses were too clouded over (never heard of failing inspection for this!), and finally, the check engine light kept coming back on, no matter how many times I reset the fault code.  It was throwing a 'intermittent open circuit' for glow plug circuit number 3.

I installed a new wiring harness for the glow plugs, and 4 new plugs- that took care of the fault.  A headlight polishing kit from Autozone took care of the headlights, and I did the drivers-side rear wheel bearing.  Given my other experiences with wheel bearings on these cars, this one went surprisingly well!

Friday, August 4, 2017

Exhaust(ing) work, take 2- Golf


I'd noticed the Golf sounding louder for a little while, but I'd been able to ignore it…  Until the thing finally actually fell off (and unfortunately stranded Suzanne):
 The break was right at the back of the Catalytic converter.  Midas (and really anyone online) wanted $800-1000 for a replacement pipe (unlike on the Trooper the rear pipe was fine and I just needed the front section, which was available, just really expensive!)…  That didn't seem right.  So I pulled out my grinder, torch, and went and bought a $8.39 pipe section from Advance Auto Parts…
A reasonably nice weld, even if it's ground down smooth...

I realized my repair section was actually a bit bigger than the original pipe I'd had, so it didn't fit in the existing joint with the rear pipe- so I had to harvest a short piece of the original pipe (which was in ok shape) and weld that on the back end to make it fit:
 The finished pipe, ready to install.
 To prevent this kind of thing from happening again (I noticed that the pipe had failed where it had been welded- makes sense sense the aluminized coating would have been burned or ground off in the welding process)- I painted the welds and actually the whole catalytic converter with POR-15.  Hopefully it lasts a good long time!

Sunday, April 9, 2017

oil & filter change- Golf

Nothing really special, just an oil & filter change on the Golf, Mileage: 215k.

Sunday, February 28, 2016

Oil changes on Trooper and Golf

Nothing too exciting to report really:

Golf- oil and filter change, 205079 miles
Trooper- oil, filter change, 166033 miles.

Also lubed the front end joints on the trooper.

also...  poured the wrong stinking oil into the golf- the 10w30 non-synthetic I'd brought home for the trooper.  Had to drain it, and put it in the trooper after the fact...  lesson: keep track of the different types of oil you bring home!

Friday, November 20, 2015

Golf Alternator replacement

Didn't take any photos of this one, but need to document dates and mileage:

on the 2003 Golf- a new alternator from Duralast, Mileage 202,400 miles.

Much info and help came from youtube:
https://www.youtube.com/watch?v=hszyGlMaofE

Otherwise pretty straightforward!

Saturday, January 24, 2015

Front bearings on the 2003 Golf TDI (plus power steering pulley)

Finally got a chance to do the bearings on the Golf.  They had been making the tell-tale sounds for a couple of months now, but things like a trip to the Antarctic and then subsequent holiday season intervened.  The 'perfect storm' of timing required for this job was that I could spend a bunch of time getting the bearing carriers out and also back in, but also that I could get in to the machine shop to do the pressing (these bearings are press-fit into the bearing carriers).  So it had to be done at least partially during the week, slightly more complicated by work, carpool, etc.

DISCLAIMER: this is _not_ meant as a "howto" in any way shape or form.  There are many excellent resources, particularly at vwvortex.com or tdiclub.com.  Also there is no substitute for the Bentley manual.  I'm not doing a step-by-step, mainly chronicling my work.

Mileage: 192,500
Date: 22-24 January

General idea:  1) Get the bearing carriers off the car, 2) press out/pull off the old bearings 3) press in the new bearings  4) get the bearing carriers back on the car.  I took many of these pictures while I was putting them back on, as I was more relaxed at that time...  the whole job took a bit longer than I expected as may become obvious...


 Step 1- Chock wheels, jack and place jackstands, remove wheels.  But step 0 was even more scary: loosening the 12-pt 30mm CV joint nut.  It took a 3 foot cheater bar and a lot of slow force to get it to move; bent my 1/2" breaker bar too.  This had to be done with the car on the ground to counteract the torque.


 Step 2- Start getting the brakes off: removing the caliper bolts- complication here was that the caliper bolts are 7mm allen, and most allen wrench do not include 7mm...  So a quick trip to the office to grab the right wrench. 


Wire up the caliper out of the way so that it's not hanging on its brake line.

And the brake disc should be free to come off.  I've removed the tie-rod end here to have more flexibility in getting to the caliper bolts, and that tie rod has to come off anyway.  In theory, the disc should come right off, but mine were frozen on, and I had to take the bearing carriers off with the discs in place, to get a better position for beating (not the discs, but the hub inside) to break them loose.


Next complication- while removing the nuts from the lower ball joint connection a 'captive' nut came free and started spinning; it also jammed on the bolt and refused to be held with wrenches, vise-grips, you name it.  So it had to be cut off.  More on the ramifications of this later.  

And once the ball joint is free, the drive axle can be pushed out of the hub.  On one side I was able to just do it by hand, the other side I needed to use a puller, as outlined in one of the nice HowTos.  Now we need to get the upper part of the bearing carrier free, which is clamped to the bottom end of the strut.  I had done this job on a previous car, and getting this joint free was a pain, so I bought a strut spreader bit from MetalNerd:  Part MN3424 or you can also find it at IDparts.com. 

This is the tool inserted in the clamp- you rotate it and it holds the clamp apart while you work it off the strut.  Having done the job without it, I can't praise it enough!  Last time I was struggling with a mini-crowbar to lever the clamp open while also hammering on it, twisting, etc.  This is way easier.  

And the bearing carrier is off the car!  Phase one complete.


 Next, bring the carriers to the machine shop with the 10-ton press.  The first step is to press the old bearings out- the only way to do this is to actually wreck the old bearings in the process- that's how it is designed.  And once I got the hubs apart from the bearing carriers, I ran into the Next Complication.  My plan was to use a bearing splitter to get the inner race off of the hub shaft, but the sensor ring for the traction control system (perforated disc visible in the picture at left) was in the way.  So, how about pulling with a normal puller? 

On the first hub (passenger side) this worked, even though there wasn't much to pull on (note that hose-clamp keeping the puller's jaws together).

On the driver's side hub, that bearing race was really stuck on there.  We tried everything, including welding the other race onto the stuck race in order to have something with an edge on which to pull...  

And discovered that the puller was stronger than the metal.  It may not be visible in the picture at left, but it's not the welds that have broken, rather it is the metal underneath.  In the end, I cut a slit in the race with a Dremel and a mini cut-off wheel (you can see the slit in the photo).  I'd heard of people doing this but had wanted to avoid it if possible- but if I'd gone there right away I would have saved at least an hour!


Once I got everything off and the carriers and hubs cleaned up, pressing the new bearings in was a breeze.  I'd put the new bearings in the freezer to contract them slightly, and with a little grease, they hardly needed the press to go in.  


The finished bearing carrier, with new-looking bearing, ready to be re-installed.  

But wait- remember that I'd had to cut off the captive nut when removing the ball joint?  One detail left there- welding on a new captive nut.

Here we are all set up to do it...  


And the finished weld with the new bolt in place.  


Not all that pretty, and I'm sure any real welders out there are cringing that I even put a picture up, but it's strong. 


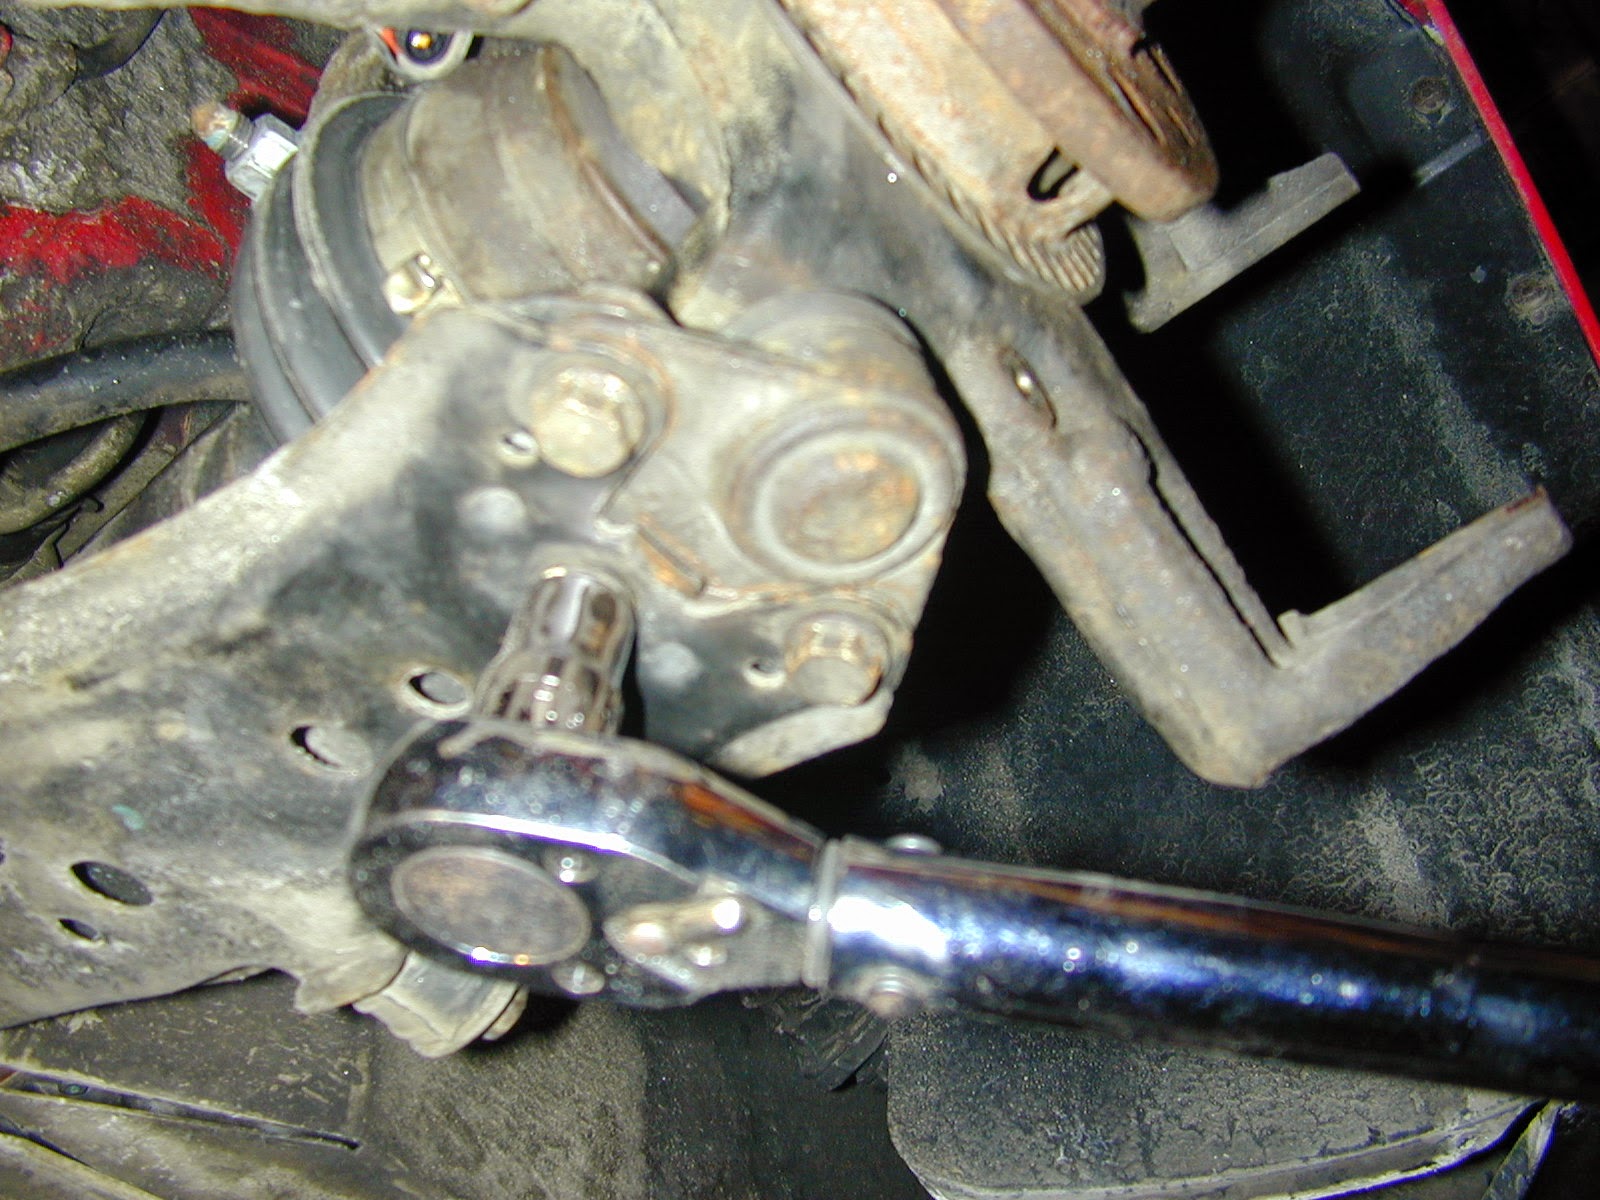
"Installation is the reverse of removal" No sense repeating a lot of the pictures, but two things to note- it's always easier and faster to put things back together than it is to get them apart!  especially if they haven't been apart in probably 100,000 miles...  The other thing to note is that proper torque settings are a good idea (note torque wrench pictured)

I always feel like getting a new nylock nut onto the tie-rod end is the bane of my existence; it's hard to keep the shaft from spinning once the nylon engages.  Fortunately on these tie-rod ends there is an allen socket on the shaft; a beautiful thing and really helpful. 


And the bearing job is finished!  All that's needed now is a front end alignment, and we're good to go.  Road test shows that the noise generated by the bearings was remarkably loud- it's not almost unsettlingly quiet. 

Now how much would you pay?  But wait!  you get more!  We had noticed a rattle in the serpentine belt, and based on some google searching I decided it was likely the clutched alternator pulley.  Bought a replacement pulley and was all ready to get it installed, but then I checked and the pulley was fine.  So why the rattle? 


The culprit; the power steering pulley mounting bolts were loose.  This was not only letting the serpentine belt rattle (as the pulley was moving out-of-round) but the bolt-holes were slowly but surely getting worn away!  I could see the metal shavings in the engine compartment, never a good sign.  


A closeup of the damage to the pulley.  I was able to file down some washers to put over the damage, and then using lock washers, remounted the pulley and made sure the bolts were torqued down well.  Hopefully the end of the story!