DISCLAIMER: this is _not_ meant as a "howto" in any way shape or form. There are many excellent resources, particularly at vwvortex.com or tdiclub.com. Also there is no substitute for the Bentley manual. I'm not doing a step-by-step, mainly chronicling my work.
Mileage: 192,500
Date: 22-24 January
General idea: 1) Get the bearing carriers off the car, 2) press out/pull off the old bearings 3) press in the new bearings 4) get the bearing carriers back on the car. I took many of these pictures while I was putting them back on, as I was more relaxed at that time... the whole job took a bit longer than I expected as may become obvious...

Step 1- Chock wheels, jack and place jackstands, remove wheels. But step 0 was even more scary: loosening the 12-pt 30mm CV joint nut. It took a 3 foot cheater bar and a lot of slow force to get it to move; bent my 1/2" breaker bar too. This had to be done with the car on the ground to counteract the torque.

Step 2- Start getting the brakes off: removing the caliper bolts- complication here was that the caliper bolts are 7mm allen, and most allen wrench do not include 7mm... So a quick trip to the office to grab the right wrench.

Wire up the caliper out of the way so that it's not hanging on its brake line.

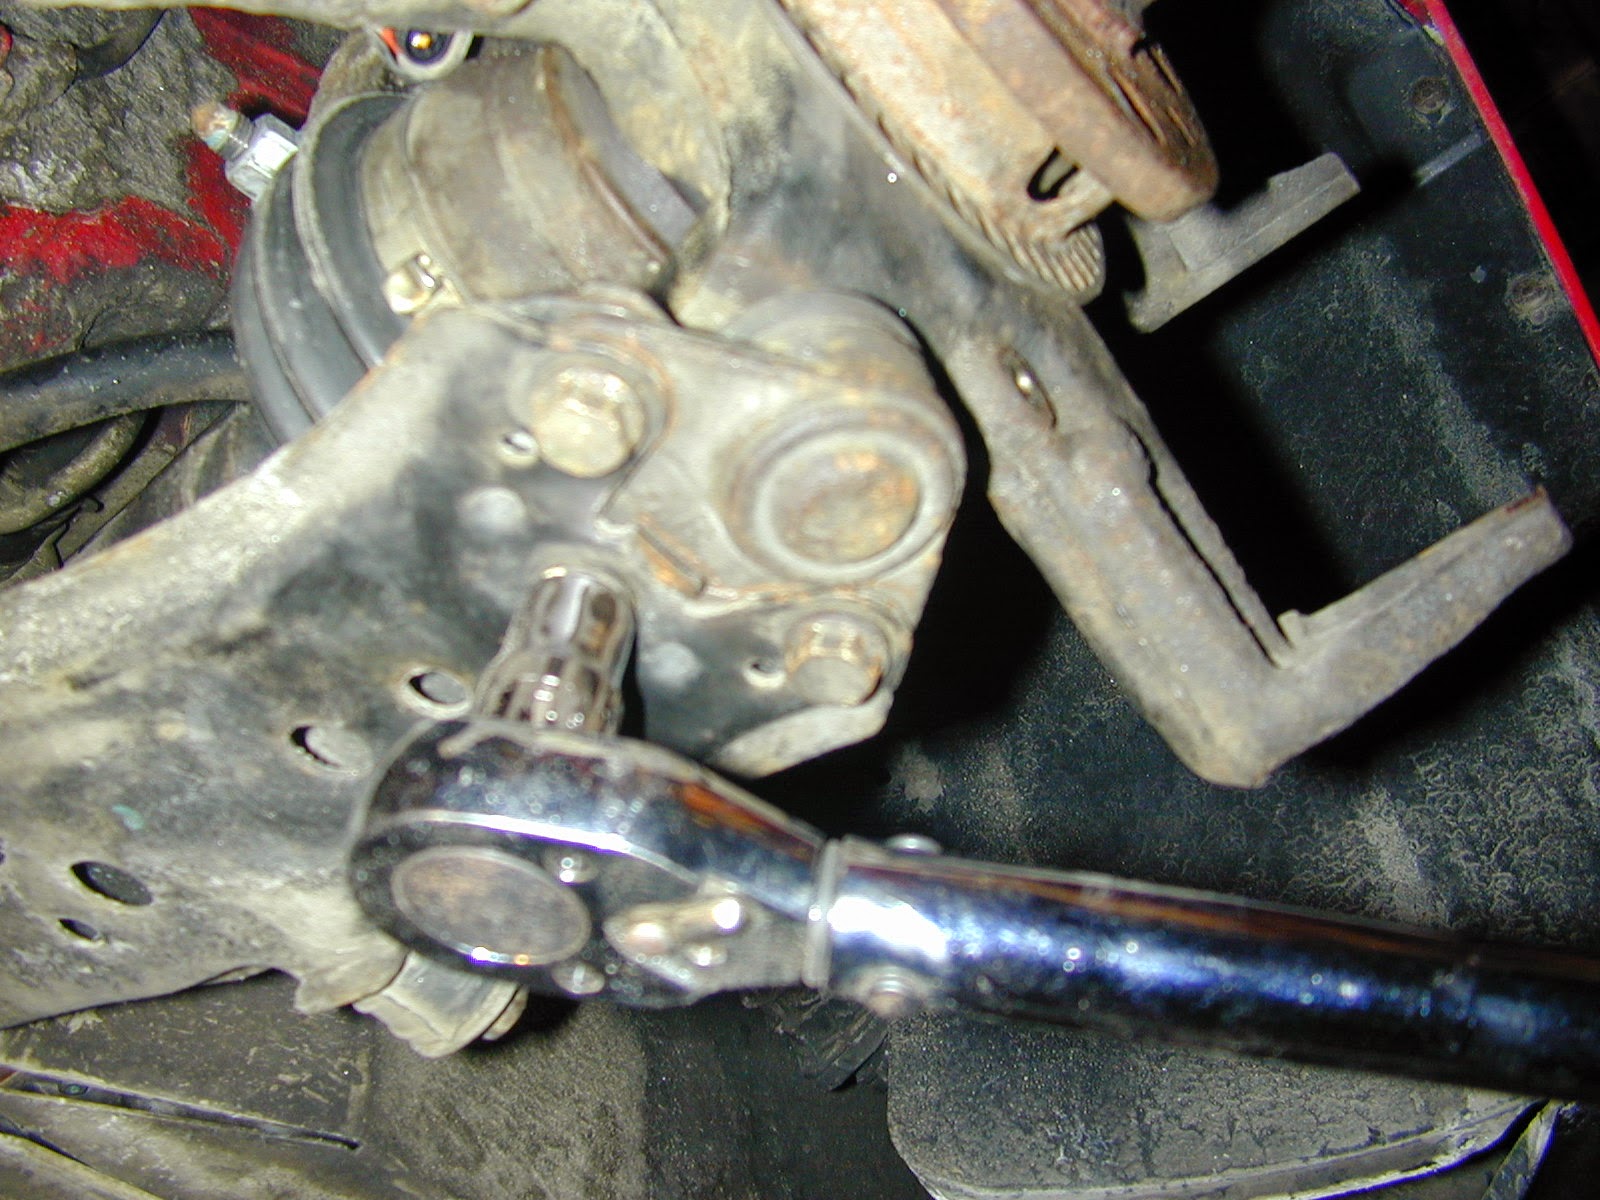
And the brake disc should be free to come off. I've removed the tie-rod end here to have more flexibility in getting to the caliper bolts, and that tie rod has to come off anyway. In theory, the disc should come right off, but mine were frozen on, and I had to take the bearing carriers off with the discs in place, to get a better position for beating (not the discs, but the hub inside) to break them loose.

Next complication- while removing the nuts from the lower ball joint connection a 'captive' nut came free and started spinning; it also jammed on the bolt and refused to be held with wrenches, vise-grips, you name it. So it had to be cut off. More on the ramifications of this later.

And once the ball joint is free, the drive axle can be pushed out of the hub. On one side I was able to just do it by hand, the other side I needed to use a puller, as outlined in one of the nice HowTos. Now we need to get the upper part of the bearing carrier free, which is clamped to the bottom end of the strut. I had done this job on a previous car, and getting this joint free was a pain, so I bought a strut spreader bit from MetalNerd: Part MN3424 or you can also find it at IDparts.com.

This is the tool inserted in the clamp- you rotate it and it holds the clamp apart while you work it off the strut. Having done the job without it, I can't praise it enough! Last time I was struggling with a mini-crowbar to lever the clamp open while also hammering on it, twisting, etc. This is way easier.

And the bearing carrier is off the car! Phase one complete.


On the first hub (passenger side) this worked, even though there wasn't much to pull on (note that hose-clamp keeping the puller's jaws together).
On the driver's side hub, that bearing race was really stuck on there. We tried everything, including welding the other race onto the stuck race in order to have something with an edge on which to pull...

And discovered that the puller was stronger than the metal. It may not be visible in the picture at left, but it's not the welds that have broken, rather it is the metal underneath. In the end, I cut a slit in the race with a Dremel and a mini cut-off wheel (you can see the slit in the photo). I'd heard of people doing this but had wanted to avoid it if possible- but if I'd gone there right away I would have saved at least an hour!

Once I got everything off and the carriers and hubs cleaned up, pressing the new bearings in was a breeze. I'd put the new bearings in the freezer to contract them slightly, and with a little grease, they hardly needed the press to go in.

The finished bearing carrier, with new-looking bearing, ready to be re-installed.

But wait- remember that I'd had to cut off the captive nut when removing the ball joint? One detail left there- welding on a new captive nut.
Here we are all set up to do it...

And the finished weld with the new bolt in place.

Not all that pretty, and I'm sure any real welders out there are cringing that I even put a picture up, but it's strong.
"Installation is the reverse of removal" No sense repeating a lot of the pictures, but two things to note- it's always easier and faster to put things back together than it is to get them apart! especially if they haven't been apart in probably 100,000 miles... The other thing to note is that proper torque settings are a good idea (note torque wrench pictured)

I always feel like getting a new nylock nut onto the tie-rod end is the bane of my existence; it's hard to keep the shaft from spinning once the nylon engages. Fortunately on these tie-rod ends there is an allen socket on the shaft; a beautiful thing and really helpful.
And the bearing job is finished! All that's needed now is a front end alignment, and we're good to go. Road test shows that the noise generated by the bearings was remarkably loud- it's not almost unsettlingly quiet.
Now how much would you pay? But wait! you get more! We had noticed a rattle in the serpentine belt, and based on some google searching I decided it was likely the clutched alternator pulley. Bought a replacement pulley and was all ready to get it installed, but then I checked and the pulley was fine. So why the rattle?

The culprit; the power steering pulley mounting bolts were loose. This was not only letting the serpentine belt rattle (as the pulley was moving out-of-round) but the bolt-holes were slowly but surely getting worn away! I could see the metal shavings in the engine compartment, never a good sign.

A closeup of the damage to the pulley. I was able to file down some washers to put over the damage, and then using lock washers, remounted the pulley and made sure the bolts were torqued down well. Hopefully the end of the story!