Didn't take any photos of this one, but need to document dates and mileage:
on the 2003 Golf- a new alternator from Duralast, Mileage 202,400 miles.
Much info and help came from youtube:
https://www.youtube.com/watch?v=hszyGlMaofE
Otherwise pretty straightforward!
Friday, November 20, 2015
Wednesday, November 11, 2015
The FrankenFridge: Mini-fridge fermentation chamber sized for a 1/2 bbl keg
So, I had converted a mini-fridge to a fermentation chamber controlled by an arduino with a Respberry Pi using the BrewPi controller software. It was working great, and all I wanted to do was enlarge the chamber, since it would fit my 6 gallon glass carboy but I wanted to be able to ferment 10-gallon batches in my new sanke keg. So I had this great idea that involved cutting a hole in the top of my existing chamber and extending it....
Long story short, in the process of attempting this great idea I managed to cut through the condenser lines of the first mini-fridge, destroying its refrig unit.
Back to the drawing board. But I realized that the reason a standard mini-fridge can't fit a sanke keg is only because it uses a bunch of space in the bottom rear for the compressor. If the compressor were moved outside that space, there'd be plenty of room...
Thus was born the idea of FrankenFridge. I had an older, smaller, mini-fridge, made in the days when things were built to be fixed- thus also built to be taken apart intact. This would be the donor unit for refrigeration. I had a second modern mini-fridge from the dump, whos compressor had presumably given out.
Step 1: remove the floor and bottom rear of the "skeleton" fridge:
 Step 2: add insulation and flooring to the areas where material has been removed:

Here you can see the interior floor- this covers the blue-foam floor and is intended to be robust to fermenters being slid over it... At least a little more robust than the bluefoam itself... you can also see some spray-expanding-foam that sealed the gaps.

I also went though and sealed up everything with duct tape, just to keep it from looking too nice... Note here that I'd needed to remove the ledges on which the fridge shelves sat, in order to make enough width for the sanke keg fermenter...
 Here are the innards of the donor fridge- compressor, cooling plate (which makes the freezer section of most mini-fridges), and condenser coils.
 And the marks for where to cut out the back of the new fridge to insert the cooling (evaporator) plate. I inserted the plate, placed the compressor right on top (bolted down) and mounted the condenser coils to the back.

Inside, I've got both the controller for the cooling unit, and for heating I use a medical heating pad. Both heating pad and fridge compressor are wired into Solid State Relays (SSRs) that are controlled by the BrewPi.
 The outside of the finished product- note the compressor sitting on top, along with the wiring and controllers for the brewpi.

 And in the end, it fits my Sanke keg fermenter almost perfectly. Note that the shelves from the inside of the door had to go as well. AFFIRMATION- Yes, this was once a commercial keg, but it was freeze-damaged, taken out of commercial service, and I acquired it completely legitimately! I promise!
Long story short, in the process of attempting this great idea I managed to cut through the condenser lines of the first mini-fridge, destroying its refrig unit.
Back to the drawing board. But I realized that the reason a standard mini-fridge can't fit a sanke keg is only because it uses a bunch of space in the bottom rear for the compressor. If the compressor were moved outside that space, there'd be plenty of room...
Thus was born the idea of FrankenFridge. I had an older, smaller, mini-fridge, made in the days when things were built to be fixed- thus also built to be taken apart intact. This would be the donor unit for refrigeration. I had a second modern mini-fridge from the dump, whos compressor had presumably given out.
Step 1: remove the floor and bottom rear of the "skeleton" fridge:


Here you can see the interior floor- this covers the blue-foam floor and is intended to be robust to fermenters being slid over it... At least a little more robust than the bluefoam itself... you can also see some spray-expanding-foam that sealed the gaps.

I also went though and sealed up everything with duct tape, just to keep it from looking too nice... Note here that I'd needed to remove the ledges on which the fridge shelves sat, in order to make enough width for the sanke keg fermenter...


Inside, I've got both the controller for the cooling unit, and for heating I use a medical heating pad. Both heating pad and fridge compressor are wired into Solid State Relays (SSRs) that are controlled by the BrewPi.


Sunday, May 31, 2015
Propagating yeast from a slant
Although there are a few tutorials out on the web about slants, I thought I'd document how I go about using slants in my brewing. I haven't taken pictures of the process of preparing and inoculating slants yet, so that will be in another post.
People have lots of reasons for using slants, but one of mine is economic- a tube of White Labs yeast or a smack pack of Wyeast can cost over $8, and it's still a good idea to make a starter. By slanting, I can effectively have an almost limitless supply of the yeast strain if I re-culture every 6-8 months, saving $8 per batch of beer, not insignificant.
Plus it's fun, which is why I brew anyway.
Anyway, here goes.
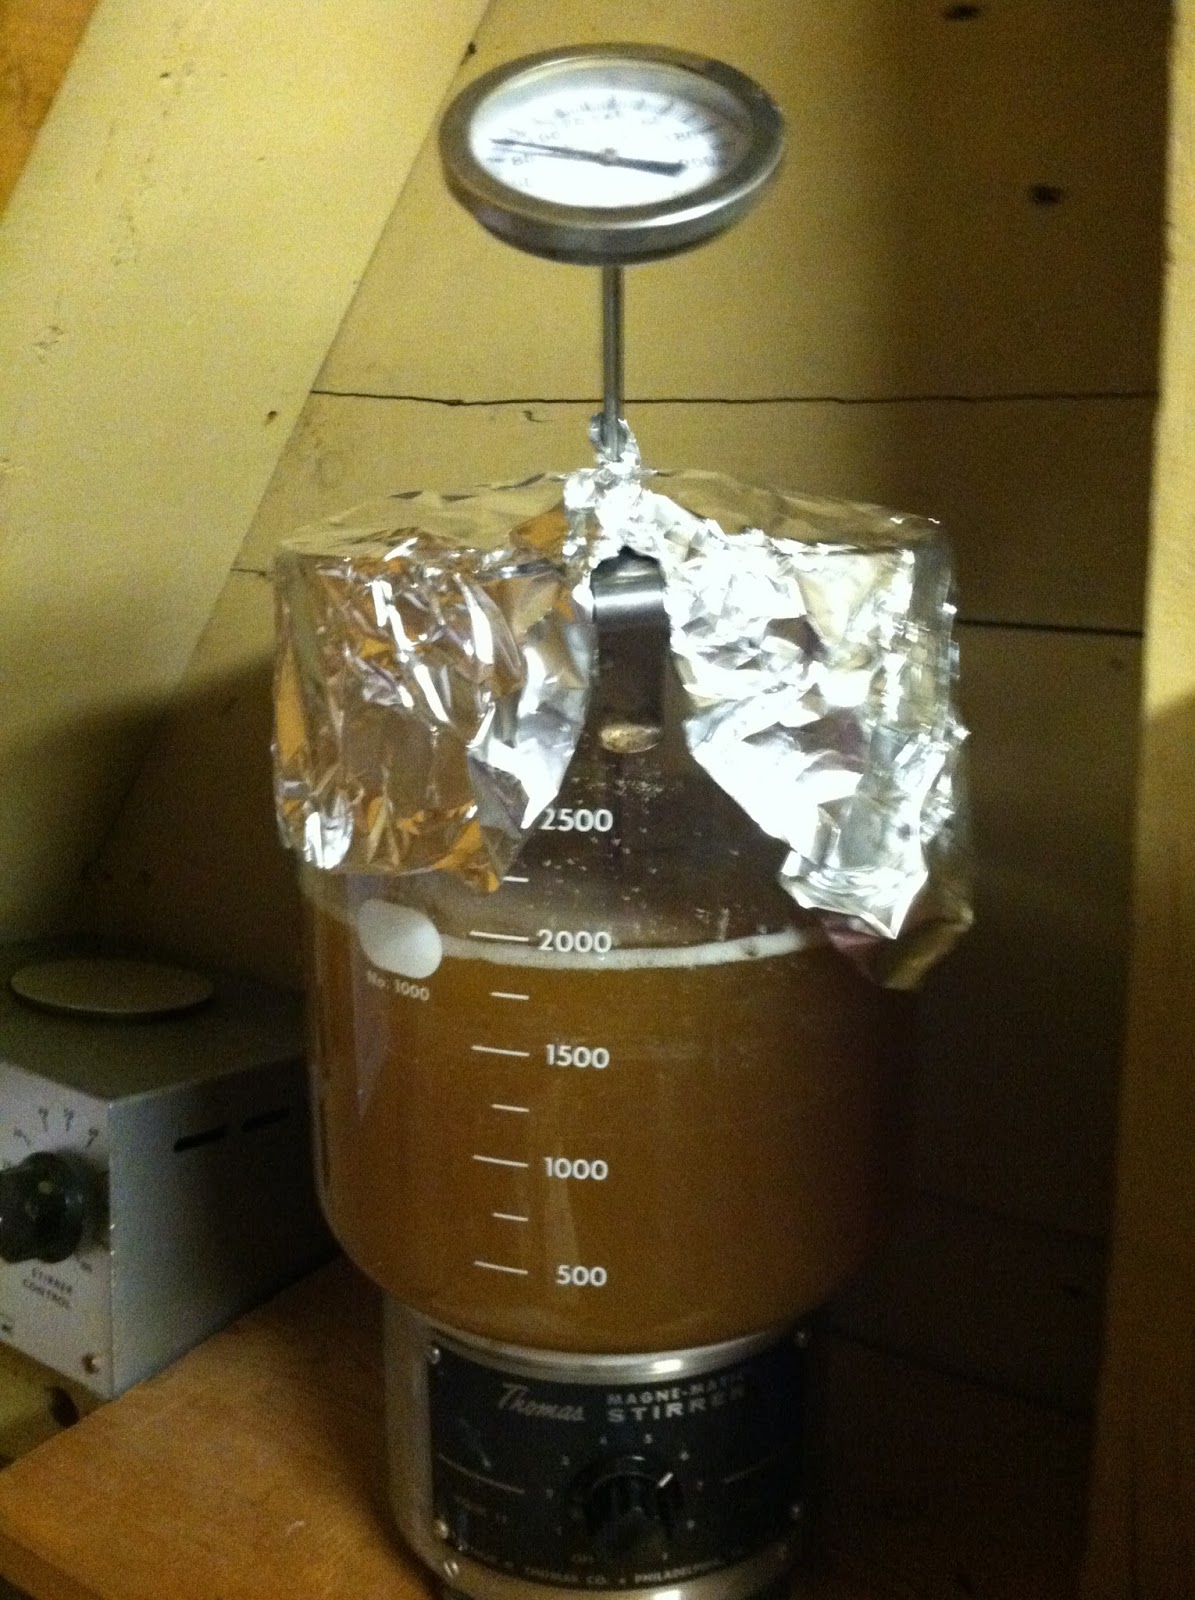
 Here are all the items I use for propagating the first stage: slant with yeast (just to the right of the pot), stir bar, dry malt extract, small pot, 1 qt canning jar, thermometer, yeast lab book and pencil! (not pictured- an inoculation loop or a straightened paper clip, and some alcohol in a shot glass- I end just using vodka with fine results)
 First step, boil 1/4 c DME with 375 ml water (I measure the water by mass, it's often the easiest way)
 Bring to a boil for about 5 minutes (thermometer is handy here to have a feel for when boiling is imminent- boilovers with this sugary liquid are pretty fast and messy.
 Transfer to the canning jar, cover with clean foil, and cool in an ice bath to 80 deg F.
 Now the delicate part, where cleanliness is most important: getting the yeast from the slant into the prepared, sterile growth media (wort). Working close to a flame (for the updraft), take the inoculation
loop from the vodka, flame the vodka off, remove the foil from the slant and flame the lip. This all should be rehearsed ahead of time, to avoid making mistakes once the slant is open.
 Touch the probably-still-very-hot inoculation loop to the agar media in the slant to cool it, and scrape some of the yeast from the slant into the wort.

Re-cover with foil, and place on stir plate for 24 hours. Experiment with the stir plate speed to get as much stirring as you can without throwing the stir bar.
 24 hours later, getting ready for the second stage- boil 3/4 c DME with 1500 ml water for the larger starter. Same deal, bring to a boil for 5 minutes, then cool in an ice bath to 80 deg F.
 Pitch the first stage starter into the second stage. By this time the yeast have multiplied a lot, and this will be pretty obvious by the turbidity of the first stage.
 Place the second stage on the stir plate for another 24-48 hours.
 And 24 hours later, we have a krausen on the starter- there is definitely a yeast party going on in there! This is the point at which I have now finished a brewday and pitch the starter into the freshly cooled, aerated wort. Then ferment away!
People have lots of reasons for using slants, but one of mine is economic- a tube of White Labs yeast or a smack pack of Wyeast can cost over $8, and it's still a good idea to make a starter. By slanting, I can effectively have an almost limitless supply of the yeast strain if I re-culture every 6-8 months, saving $8 per batch of beer, not insignificant.
Plus it's fun, which is why I brew anyway.
Anyway, here goes.


loop from the vodka, flame the vodka off, remove the foil from the slant and flame the lip. This all should be rehearsed ahead of time, to avoid making mistakes once the slant is open.


Re-cover with foil, and place on stir plate for 24 hours. Experiment with the stir plate speed to get as much stirring as you can without throwing the stir bar.


Sunday, April 12, 2015
Sugaring off
Time to convert the sweet sap from our two maple trees to syrup... It's sugaring season!
Our collection had a slow start, but this weekend we boiled (and are continuing to boil, as I type) over 28 gallons of sap. We should get 3/4-1 gallon of syrup from it. The classic ratio is 40:1, but our previous experience has shown us that the sap from our trees has a higher-than-usual sugar content.

Our evaporating setup uses our propane burner that normally is used for brewing, and a large stainless kettle. Once it's at a boil, we add sap to it gradually, using a cooler that otherwise serves as a mash tun in brewing. The valve from the mash tun is set to a dribble, which drops into a pre-heating pan, suspended over the main boil on a wire rack. This keeps the cold sap from breaking the boil as it drips in. As the cooler drains, we add sap to it from our white food-grade garbage can which has been our storage bin.
Later, we'll finish the boiling in the kitchen, to get the density just right. More on that in another post!

Our collection had a slow start, but this weekend we boiled (and are continuing to boil, as I type) over 28 gallons of sap. We should get 3/4-1 gallon of syrup from it. The classic ratio is 40:1, but our previous experience has shown us that the sap from our trees has a higher-than-usual sugar content.
Our evaporating setup uses our propane burner that normally is used for brewing, and a large stainless kettle. Once it's at a boil, we add sap to it gradually, using a cooler that otherwise serves as a mash tun in brewing. The valve from the mash tun is set to a dribble, which drops into a pre-heating pan, suspended over the main boil on a wire rack. This keeps the cold sap from breaking the boil as it drips in. As the cooler drains, we add sap to it from our white food-grade garbage can which has been our storage bin.
Later, we'll finish the boiling in the kitchen, to get the density just right. More on that in another post!
Saturday, January 24, 2015
Front bearings on the 2003 Golf TDI (plus power steering pulley)
Finally got a chance to do the bearings on the Golf. They had been making the tell-tale sounds for a couple of months now, but things like a trip to the Antarctic and then subsequent holiday season intervened. The 'perfect storm' of timing required for this job was that I could spend a bunch of time getting the bearing carriers out and also back in, but also that I could get in to the machine shop to do the pressing (these bearings are press-fit into the bearing carriers). So it had to be done at least partially during the week, slightly more complicated by work, carpool, etc.
DISCLAIMER: this is _not_ meant as a "howto" in any way shape or form. There are many excellent resources, particularly at vwvortex.com or tdiclub.com. Also there is no substitute for the Bentley manual. I'm not doing a step-by-step, mainly chronicling my work.
Mileage: 192,500
Date: 22-24 January
General idea: 1) Get the bearing carriers off the car, 2) press out/pull off the old bearings 3) press in the new bearings 4) get the bearing carriers back on the car. I took many of these pictures while I was putting them back on, as I was more relaxed at that time... the whole job took a bit longer than I expected as may become obvious...

Step 1- Chock wheels, jack and place jackstands, remove wheels. But step 0 was even more scary: loosening the 12-pt 30mm CV joint nut. It took a 3 foot cheater bar and a lot of slow force to get it to move; bent my 1/2" breaker bar too. This had to be done with the car on the ground to counteract the torque.

Step 2- Start getting the brakes off: removing the caliper bolts- complication here was that the caliper bolts are 7mm allen, and most allen wrench do not include 7mm... So a quick trip to the office to grab the right wrench.

Wire up the caliper out of the way so that it's not hanging on its brake line.

And the brake disc should be free to come off. I've removed the tie-rod end here to have more flexibility in getting to the caliper bolts, and that tie rod has to come off anyway. In theory, the disc should come right off, but mine were frozen on, and I had to take the bearing carriers off with the discs in place, to get a better position for beating (not the discs, but the hub inside) to break them loose.

Next complication- while removing the nuts from the lower ball joint connection a 'captive' nut came free and started spinning; it also jammed on the bolt and refused to be held with wrenches, vise-grips, you name it. So it had to be cut off. More on the ramifications of this later.

And once the ball joint is free, the drive axle can be pushed out of the hub. On one side I was able to just do it by hand, the other side I needed to use a puller, as outlined in one of the nice HowTos. Now we need to get the upper part of the bearing carrier free, which is clamped to the bottom end of the strut. I had done this job on a previous car, and getting this joint free was a pain, so I bought a strut spreader bit from MetalNerd: Part MN3424 or you can also find it at IDparts.com.

This is the tool inserted in the clamp- you rotate it and it holds the clamp apart while you work it off the strut. Having done the job without it, I can't praise it enough! Last time I was struggling with a mini-crowbar to lever the clamp open while also hammering on it, twisting, etc. This is way easier.

And the bearing carrier is off the car! Phase one complete.
 Next, bring the carriers to the machine shop with the 10-ton press. The
first step is to press the old bearings out- the only way to do this is
to actually wreck the old bearings in the process- that's how it is
designed. And once I got the hubs apart from the bearing carriers, I
ran into the Next Complication. My plan was to use a bearing splitter
to get the inner race off of the hub shaft, but the sensor ring for the
traction control system (perforated disc visible in the picture at left) was in the way. So, how about pulling with a normal puller?
Next, bring the carriers to the machine shop with the 10-ton press. The
first step is to press the old bearings out- the only way to do this is
to actually wreck the old bearings in the process- that's how it is
designed. And once I got the hubs apart from the bearing carriers, I
ran into the Next Complication. My plan was to use a bearing splitter
to get the inner race off of the hub shaft, but the sensor ring for the
traction control system (perforated disc visible in the picture at left) was in the way. So, how about pulling with a normal puller?

On the first hub (passenger side) this worked, even though there wasn't much to pull on (note that hose-clamp keeping the puller's jaws together).
On the driver's side hub, that bearing race was really stuck on there. We tried everything, including welding the other race onto the stuck race in order to have something with an edge on which to pull...

And discovered that the puller was stronger than the metal. It may not be visible in the picture at left, but it's not the welds that have broken, rather it is the metal underneath. In the end, I cut a slit in the race with a Dremel and a mini cut-off wheel (you can see the slit in the photo). I'd heard of people doing this but had wanted to avoid it if possible- but if I'd gone there right away I would have saved at least an hour!

Once I got everything off and the carriers and hubs cleaned up, pressing the new bearings in was a breeze. I'd put the new bearings in the freezer to contract them slightly, and with a little grease, they hardly needed the press to go in.

The finished bearing carrier, with new-looking bearing, ready to be re-installed.

But wait- remember that I'd had to cut off the captive nut when removing the ball joint? One detail left there- welding on a new captive nut.
Here we are all set up to do it...

And the finished weld with the new bolt in place.

Not all that pretty, and I'm sure any real welders out there are cringing that I even put a picture up, but it's strong.
"Installation is the reverse of removal" No sense repeating a lot of the pictures, but two things to note- it's always easier and faster to put things back together than it is to get them apart! especially if they haven't been apart in probably 100,000 miles... The other thing to note is that proper torque settings are a good idea (note torque wrench pictured)

I always feel like getting a new nylock nut onto the tie-rod end is the bane of my existence; it's hard to keep the shaft from spinning once the nylon engages. Fortunately on these tie-rod ends there is an allen socket on the shaft; a beautiful thing and really helpful.
And the bearing job is finished! All that's needed now is a front end alignment, and we're good to go. Road test shows that the noise generated by the bearings was remarkably loud- it's not almost unsettlingly quiet.
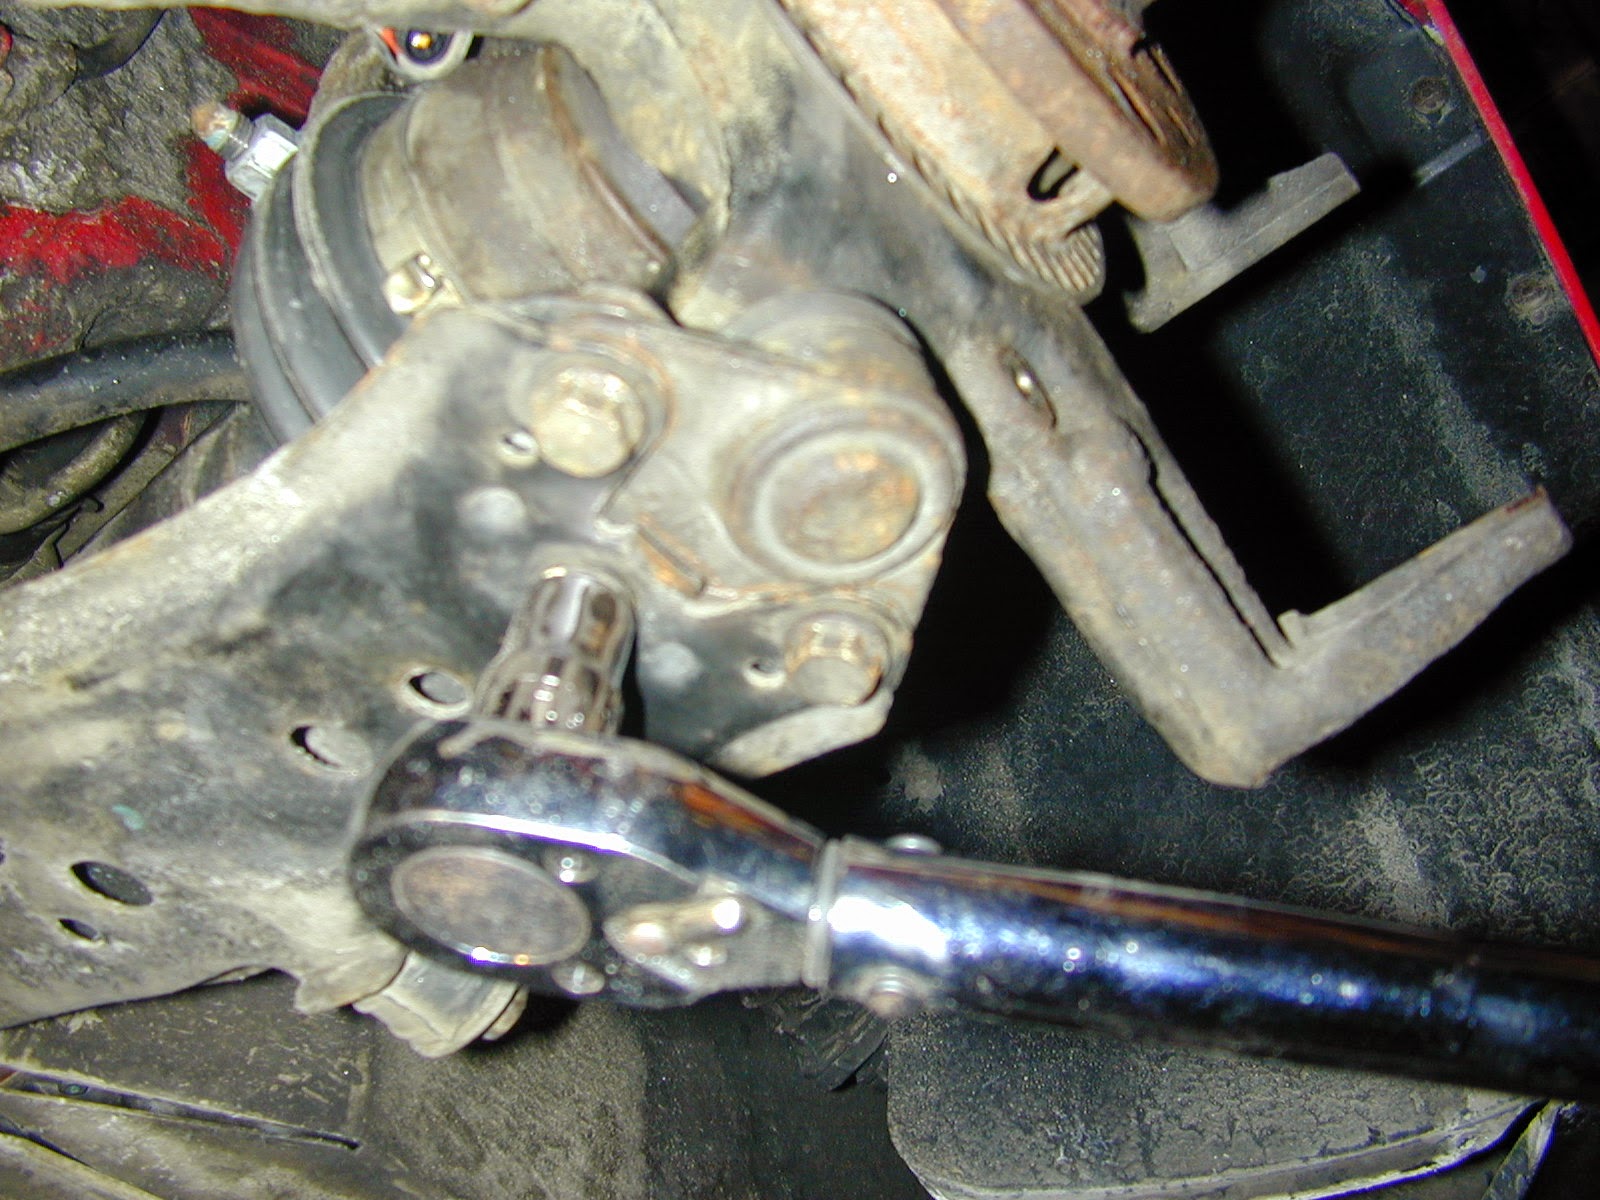
Now how much would you pay? But wait! you get more! We had noticed a rattle in the serpentine belt, and based on some google searching I decided it was likely the clutched alternator pulley. Bought a replacement pulley and was all ready to get it installed, but then I checked and the pulley was fine. So why the rattle?

The culprit; the power steering pulley mounting bolts were loose. This was not only letting the serpentine belt rattle (as the pulley was moving out-of-round) but the bolt-holes were slowly but surely getting worn away! I could see the metal shavings in the engine compartment, never a good sign.

A closeup of the damage to the pulley. I was able to file down some washers to put over the damage, and then using lock washers, remounted the pulley and made sure the bolts were torqued down well. Hopefully the end of the story!
DISCLAIMER: this is _not_ meant as a "howto" in any way shape or form. There are many excellent resources, particularly at vwvortex.com or tdiclub.com. Also there is no substitute for the Bentley manual. I'm not doing a step-by-step, mainly chronicling my work.
Mileage: 192,500
Date: 22-24 January
General idea: 1) Get the bearing carriers off the car, 2) press out/pull off the old bearings 3) press in the new bearings 4) get the bearing carriers back on the car. I took many of these pictures while I was putting them back on, as I was more relaxed at that time... the whole job took a bit longer than I expected as may become obvious...
Step 1- Chock wheels, jack and place jackstands, remove wheels. But step 0 was even more scary: loosening the 12-pt 30mm CV joint nut. It took a 3 foot cheater bar and a lot of slow force to get it to move; bent my 1/2" breaker bar too. This had to be done with the car on the ground to counteract the torque.
Step 2- Start getting the brakes off: removing the caliper bolts- complication here was that the caliper bolts are 7mm allen, and most allen wrench do not include 7mm... So a quick trip to the office to grab the right wrench.
Wire up the caliper out of the way so that it's not hanging on its brake line.
And the brake disc should be free to come off. I've removed the tie-rod end here to have more flexibility in getting to the caliper bolts, and that tie rod has to come off anyway. In theory, the disc should come right off, but mine were frozen on, and I had to take the bearing carriers off with the discs in place, to get a better position for beating (not the discs, but the hub inside) to break them loose.
Next complication- while removing the nuts from the lower ball joint connection a 'captive' nut came free and started spinning; it also jammed on the bolt and refused to be held with wrenches, vise-grips, you name it. So it had to be cut off. More on the ramifications of this later.
And once the ball joint is free, the drive axle can be pushed out of the hub. On one side I was able to just do it by hand, the other side I needed to use a puller, as outlined in one of the nice HowTos. Now we need to get the upper part of the bearing carrier free, which is clamped to the bottom end of the strut. I had done this job on a previous car, and getting this joint free was a pain, so I bought a strut spreader bit from MetalNerd: Part MN3424 or you can also find it at IDparts.com.
This is the tool inserted in the clamp- you rotate it and it holds the clamp apart while you work it off the strut. Having done the job without it, I can't praise it enough! Last time I was struggling with a mini-crowbar to lever the clamp open while also hammering on it, twisting, etc. This is way easier.
And the bearing carrier is off the car! Phase one complete.
On the first hub (passenger side) this worked, even though there wasn't much to pull on (note that hose-clamp keeping the puller's jaws together).
On the driver's side hub, that bearing race was really stuck on there. We tried everything, including welding the other race onto the stuck race in order to have something with an edge on which to pull...
And discovered that the puller was stronger than the metal. It may not be visible in the picture at left, but it's not the welds that have broken, rather it is the metal underneath. In the end, I cut a slit in the race with a Dremel and a mini cut-off wheel (you can see the slit in the photo). I'd heard of people doing this but had wanted to avoid it if possible- but if I'd gone there right away I would have saved at least an hour!
Once I got everything off and the carriers and hubs cleaned up, pressing the new bearings in was a breeze. I'd put the new bearings in the freezer to contract them slightly, and with a little grease, they hardly needed the press to go in.
The finished bearing carrier, with new-looking bearing, ready to be re-installed.
But wait- remember that I'd had to cut off the captive nut when removing the ball joint? One detail left there- welding on a new captive nut.
Here we are all set up to do it...
And the finished weld with the new bolt in place.
Not all that pretty, and I'm sure any real welders out there are cringing that I even put a picture up, but it's strong.
"Installation is the reverse of removal" No sense repeating a lot of the pictures, but two things to note- it's always easier and faster to put things back together than it is to get them apart! especially if they haven't been apart in probably 100,000 miles... The other thing to note is that proper torque settings are a good idea (note torque wrench pictured)
I always feel like getting a new nylock nut onto the tie-rod end is the bane of my existence; it's hard to keep the shaft from spinning once the nylon engages. Fortunately on these tie-rod ends there is an allen socket on the shaft; a beautiful thing and really helpful.
And the bearing job is finished! All that's needed now is a front end alignment, and we're good to go. Road test shows that the noise generated by the bearings was remarkably loud- it's not almost unsettlingly quiet.
Now how much would you pay? But wait! you get more! We had noticed a rattle in the serpentine belt, and based on some google searching I decided it was likely the clutched alternator pulley. Bought a replacement pulley and was all ready to get it installed, but then I checked and the pulley was fine. So why the rattle?
The culprit; the power steering pulley mounting bolts were loose. This was not only letting the serpentine belt rattle (as the pulley was moving out-of-round) but the bolt-holes were slowly but surely getting worn away! I could see the metal shavings in the engine compartment, never a good sign.
A closeup of the damage to the pulley. I was able to file down some washers to put over the damage, and then using lock washers, remounted the pulley and made sure the bolts were torqued down well. Hopefully the end of the story!
Subscribe to:
Posts (Atom)