Showing posts with label Brewing. Show all posts

Saturday, February 13, 2021

New Grain Mill mounting

Finally got the grain mill (a MaltMill from Schnmidling industries)  integrated into my main brewstand, instead of being freestanding (really, resting on a 5 gallon bucket).   I can now mill directly into my strike water- so milling and mashing-in are the same step.  Saves time! 

Control side, showing the hopper (still small, I need to feed it about 5-8 times during mashing in), the power switch, from where I stand for mashing in. 
Drive side.  I stand on the other side from this!  otherwise I'd definitely have a guard on the belt and pulleys. 
Full context.  The mash/lauter tun is the highest point, with the grain mill above.  The brewkettle is from Spike Brewing on the left.  The hot liquor tank is lower right, in this photo being fed with hot water from the kettle.  When I am able to get 220 VAC to the garage, I'll electrify and PID the HLT which will make life easier... 

Wednesday, January 16, 2019

Inoculating blank slants with yeast

After the blank slants are made up and determined to actually be sterile (letting them sit for a week or so and if they don't grow anything I feel pretty safe), it's time to put in some of the yeast we want to store.  This is known as inoculating the slants.  This is the part that is probably the most sketchy, since we have set up a great environment for a microorganism to grow, and only want the one we are interested in, not other random critters...  So staying clean is essential.  The basic procedure isn't that complicated, but exactly how you go about it does become important.
 Here are all the things I need laid out.  Notebook (of course!), blank slants, an oil lamp (in a real lab they'd use a bunsen burner), shot glass of vodka (etoh in a real lab) in which sits my wire inoculation loop (a bit of paperclip would work ok as well), sterile pipette, and a sterile test tube (I'd sterilized it when I made the blank slants).

The pipette and empty test tube are for holding the yeast starter culture that I'd made for this day's brew.  It was a simple, straightforward 2 liter culture of (in this case) White Labs WLP001.  The point of the oil lamp or open flame is to create an area of updraft, so the other microorganisms in the air don't settle into whatever we're working on.  So we grab a bit of yeast starter in the clean tube, light the lamp, and then, after practicing a bit without uncapping anything, we carefully:
 Uncap the blank slant (I currently use plain test tubes with caps that I make out of foil) ,
 After flaming the vodka off the inoculation loop to sterilize it, dip the loop in the yeast, and
 draw the loop across the surface of the slant in a zigzag pattern.  When I'm doing it, I can't see the trail of stuff that's left, so just watch what the loop does to try to achieve the pattern.

 Then I carefully replace the foil cap on the tube.  When I've repeated this for all of the slants I want to do, I put them in a ziplock bag and put them someplace warm to kind of 'bloom'.  After a few days we should start to see evidence of yeast cells growing:
And we can see the zigzag streaks that I made, now in a line of yeast cells!  Now that they are looking healthy, I put them in the fridge.  There's still time for it all to go wrong, however- if you look back at this post I made in 2013...  but at least it's usually fairly obvious!

Next, have a look at my procedure for propagating yeast from a slant to get a starter for a batch.  In this case I've made about 15 slants, which saves me around $120 over the course of 15 batches of beer, rather than buying straight from White Labs!

Tuesday, January 1, 2019

Preparing blank slants for yeast storage

Chronologically this is out of order, since I posted about the opposite side of this process, propagating yeast from a slant, some time ago...  But here is my procedure for producing blank slants, ready for inoculation with yeast (will post about that later).
 First step- boil 15 g Dry Malt Extract in 250 ml of water.
 Have the test tubes ready- I put them in 1 pt mason jars for easy movement to the canner (later), but a test tube rack would work of course.  After boiling the DME for 5 minutes, I whisk in 1 tsp of Agar Agar powder for gelling, and while the heat is still on (gets pretty goopy pretty fast otherwise):
 Suck a little up in a syringe, and
 squirt it into the test tubes.  I try to fill them a little less than 1/2 full.
 Here they are all filled.  You can also see the roughly 2" of water I put in there as well, to keep the mason jars stable when we put them in the canner.
 Also in the canner (hard to see here) is about 3 qt of water for the boiling/steam thing.  If we didn't have the water in the mason jars, they'd tend to want to float away.
 Bring the canner up to 15 PSI and hold it there for about 10 minutes, then cool until we can work with it...
 Then carefully cap the tubes with fresh foil and lay them on their sides to cool and gel.
 Once they have solidified as a slant, I tape the foil on, bag them, and put them in the fridge.  They are now ready for inoculation, next time I have a starter!

Wednesday, November 11, 2015

The FrankenFridge: Mini-fridge fermentation chamber sized for a 1/2 bbl keg

So, I had converted a mini-fridge to a fermentation chamber controlled by an arduino with a Respberry Pi using the BrewPi controller software.  It was working great, and all I wanted to do was enlarge the chamber, since it would fit my 6 gallon glass carboy but I wanted to be able to ferment 10-gallon batches in my new sanke keg.  So I had this great idea that involved cutting a hole in the top of my existing chamber and extending it....

Long story short, in the process of attempting this great idea I managed to cut through the condenser lines of the first mini-fridge, destroying its refrig unit.

Back to the drawing board.  But I realized that the reason a standard mini-fridge can't fit a sanke keg is only because it uses a bunch of space in the bottom rear for the compressor.  If the compressor were moved outside that space, there'd be plenty of room...

Thus was born the idea of FrankenFridge.  I had an older, smaller, mini-fridge, made in the days when things were built to be fixed- thus also built to be taken apart intact.  This would be the donor unit for refrigeration.  I had a second modern mini-fridge from the dump, whos compressor had presumably given out.

Step 1: remove the floor and bottom rear of the "skeleton" fridge:

Step 2: add insulation and flooring to the areas where material has been removed:


 Here you can see the interior floor- this covers the blue-foam floor and is intended to be robust to fermenters being slid over it...  At least a little more robust than the bluefoam itself...  you can also see some spray-expanding-foam that sealed the gaps.

 I also went though and sealed up everything with duct tape, just to keep it from looking too nice...  Note here that I'd needed to remove the ledges on which the fridge shelves sat, in order to make enough width for the sanke keg fermenter...
 Here are the innards of the donor fridge- compressor, cooling plate (which makes the freezer section of most mini-fridges), and condenser coils. 
 And the marks for where to cut out the back of the new fridge to insert the cooling (evaporator) plate.  I inserted the plate, placed the compressor right on top (bolted down) and mounted the condenser coils to the back.

Inside, I've got both the controller for the cooling unit, and for heating I use a medical heating pad.  Both heating pad and fridge compressor are wired into Solid State Relays (SSRs) that are controlled by the BrewPi.  
 The outside of the finished product- note the compressor sitting on top, along with the wiring and controllers for the brewpi.
And in the end, it fits my Sanke keg fermenter almost perfectly.  Note that the shelves from the inside of the door had to go as well.  AFFIRMATION- Yes, this was once a commercial keg, but it was freeze-damaged, taken out of commercial service, and I acquired it completely legitimately!  I promise!

Sunday, May 31, 2015

Propagating yeast from a slant

Although there are a few tutorials out on the web about slants, I thought I'd document how I go about using slants in my brewing.  I haven't taken pictures of the process of preparing and inoculating slants yet, so that will be in another post.

People have lots of reasons for using slants, but one of mine is economic- a tube of White Labs yeast or a smack pack of Wyeast can cost over $8, and it's still a good idea to make a starter.  By slanting, I can effectively have an almost limitless supply of the yeast strain if I re-culture every 6-8 months, saving $8 per batch of beer, not insignificant.

Plus it's fun, which is why I brew anyway.

Anyway, here goes.

 Here are all the items I use for propagating the first stage: slant with yeast (just to the right of the pot), stir bar, dry malt extract, small pot, 1 qt canning jar, thermometer, yeast lab book and pencil! (not pictured- an inoculation loop or a straightened paper clip, and some alcohol in a shot glass- I end just using vodka with fine results)
First step, boil 1/4 c DME with 375 ml water (I measure the water by mass, it's often the easiest way)

Bring to a boil for about 5 minutes (thermometer is handy here to have a feel for when boiling is imminent- boilovers with this sugary liquid are pretty fast and messy.

 Transfer to the canning jar, cover with clean foil, and cool in an ice bath to 80 deg F.

Now the delicate part, where cleanliness is most important: getting the yeast from the slant into the prepared, sterile growth media (wort).  Working close to a flame (for the updraft), take the inoculation
loop from the vodka, flame the vodka off, remove the foil from the slant and flame the lip.  This all should be rehearsed ahead of time, to avoid making mistakes once the slant is open.

 Touch the probably-still-very-hot inoculation loop to the agar media in the slant to cool it, and scrape some of the yeast from the slant into the wort.

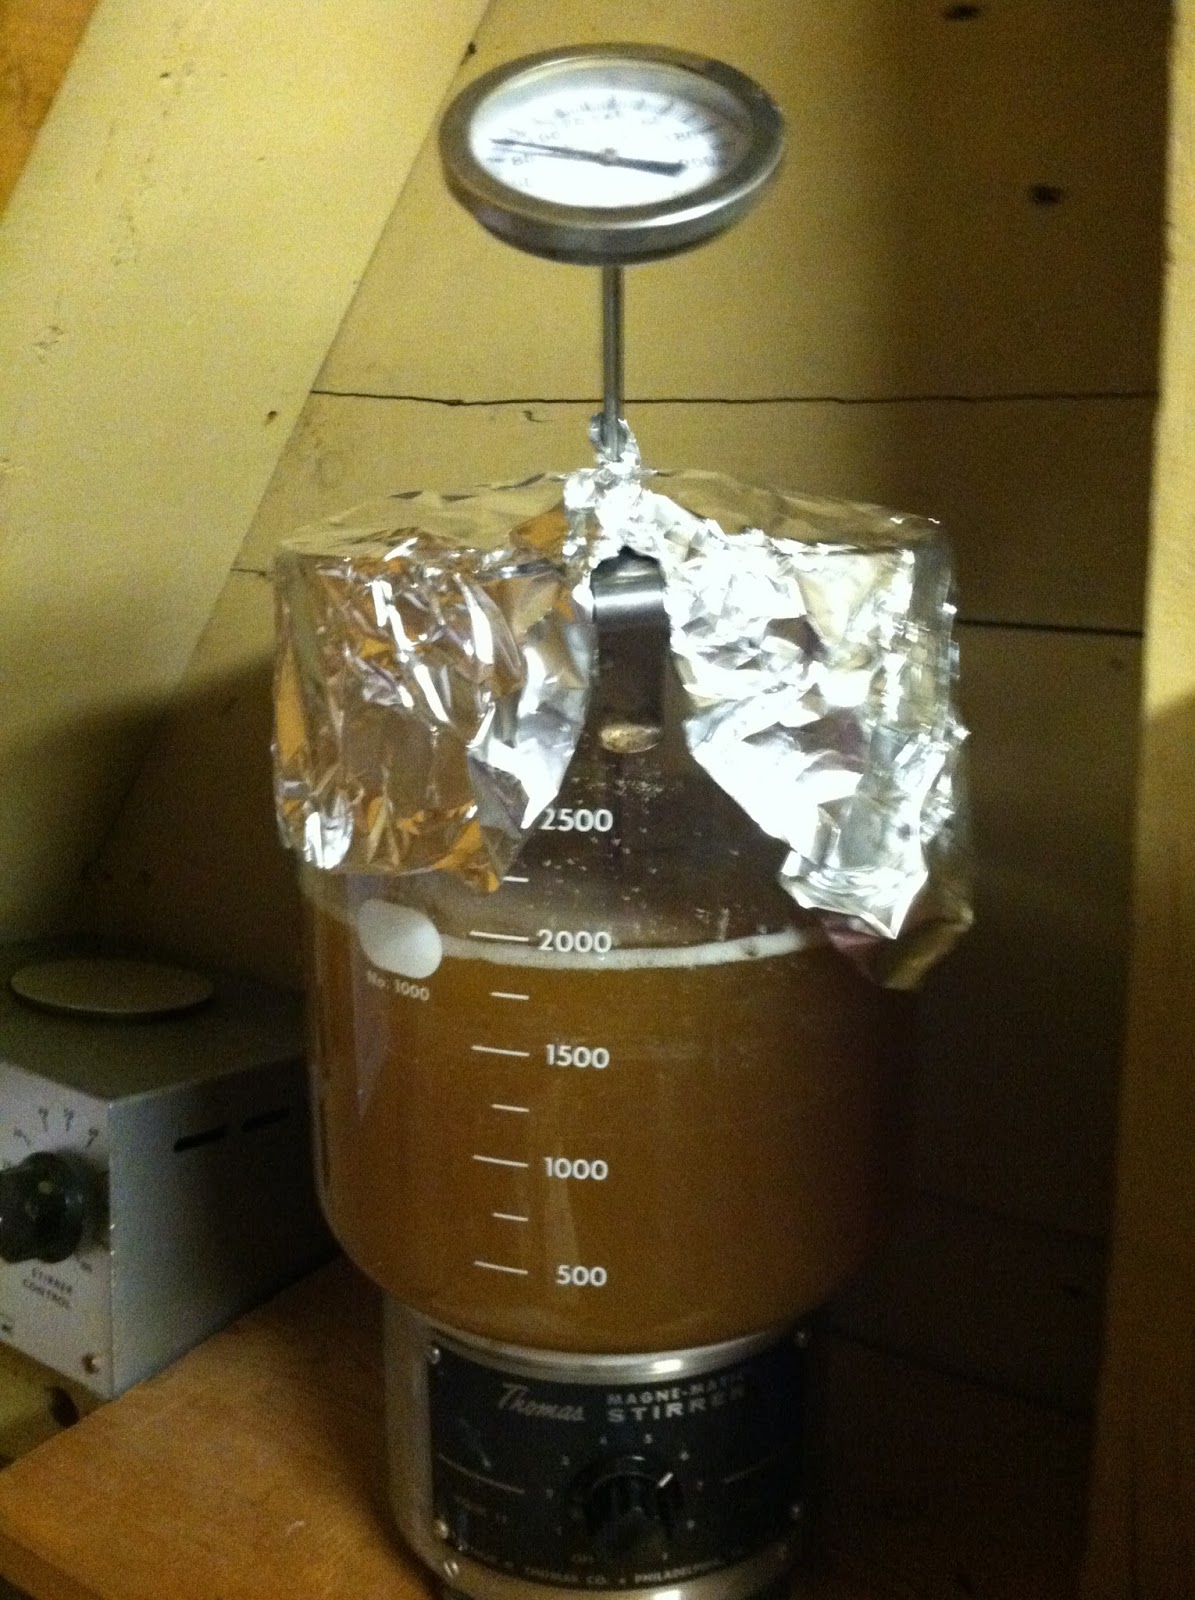
Re-cover with foil, and place on stir plate for 24 hours.  Experiment with the stir plate speed to get as much stirring as you can without throwing the stir bar. 

24 hours later, getting ready for the second stage- boil 3/4 c DME with 1500 ml water for the larger starter.  Same deal, bring to a boil for 5 minutes, then cool in an ice bath to 80 deg F.  

Pitch the first stage starter into the second stage.  By this time the yeast have multiplied a lot, and this will be pretty obvious by the turbidity of the first stage.

Place the second stage on the stir plate for another 24-48 hours.  

And 24 hours later, we have a krausen on the starter- there is definitely a yeast party going on in there!  This is the point at which I have now finished a brewday and pitch the starter into the freshly cooled, aerated wort.  Then ferment away!

Monday, September 29, 2014

Wyeast 1084 + Nutrient + starter + Stout == BOOM!

I haven't seen this kind of activity in a while.  It's definitely exhilarating!  I honestly don't know if 1) it's the stout recipe I used (a modification of the deception cream stout from HomebrewTalk forums), or 2) using yeast nutrient (haven't in a long time, tried again this round), or 3) enough aeration (still shaking the fermenter, but I did it for longer this time), or 4) the Wyeast 1084 Irish Ale yeast I'm using (my first time using this yeast). 

Anyway, it's nice to know it's doing its job!

Monday, March 3, 2014

How you know your slant is infected...

Really the photo says it all.  This was one spectacular failure!  This was my first attempt at slanting, and the slants are now about 3 months old.  Not sure if it was my slant preparation procedure, my inoculating procedure, or my storage that was at fault here, but I did do all the prep without a pressure cooker, which could have contributed.  We'll see!  I have another set of slants that I did more recently, and have just successfully propagated the yeast into a batch of beer through a 2 stage starter (375 ml and then 1 l).  

Thursday, May 2, 2013

New Brewing Structure

So, I've been brewing with all grain for some time now, and I've always used a gravity-feed system, preferring not to mess with pumps and such.  When we lived in Seattle, I built a "3 tier" stand out of scrap lumber that worked pretty well, but what I never really realized that we were actually using 4 tiers.  We set the 3 tier stand up on our deck, and then sparged from the Hot Liquor Tank (HLT) to the Mash Tun and into the Brewkettle, finally running off (yes, the 4th tier) to the fermentation vessel (glass carboy) on the ground.

After a stint in England where we weren't able to bring our brewing gear, we moved to Hanover.  After a while I built a new brew stand, making a solid 3 tier structure from repurposed steel channel and some MDF countertop from the local scrap heap:

So, from left, we have the HLT (10 gal blue cooler), Mash Tun (5 gal orange cooler) and Brewkettle (converted keg).

This system worked fine, but left a few things to be desired.  In the Hanover climate, we couldn't brew outdoors all season as we did in Seattle, so this had to be in the garage.  Thus it by its nature couldn't be up on the deck...  And the headspace in the garage will not allow us to go any higher.

And the biggest issue I felt like I faced was that, in order to run off the final wort into the fermenter, I had to lift the kettle, containing 5.5 gallons of boiling-hot wort, up to the next tier.  Astute viewers will note that the kettle has no handles, so lifting has to be done from the bottom of the kettle.  Note that the bottom of the kettle had propane flames on it until just recently, so will be quite hot.  And with a wort gravity of about 1.065, we're looking at just under 50 pounds to lift.

I felt that this was an accident waiting to happen.


I thought a lot about what to do, and how to do it.  I thought about clever systems that could rock and use leverage to get the kettle up high enough, and yes, I did consider just buying a pump.  I also didn't want to start with a new design from scratch, for a few reasons, but mostly because it's my style to repurpose existing stock.

So in the end, I constructed a more compact system with adjustable shelves, using the same channel, anchored to the support post that holds up the roof beam of the garage:

Less "counter" space, true, but it also takes up less garage space, which is a great plus.  The burner now sits on a shelf custom designed for it, and the HLT and Mash Tun have shelves with just a little space left over.


But the great part of this new system is that the HLT and burner shelves can be raised using a hoist.  The hoist motor is salvaged from an old decommissioned borehole logging winch, bolted to the roof beam (Olivia wanted to be in the shot too):
 

The cable going to the hoist can be attached to either the HLT shelf or the burner shelf, using a grab hook and a loop of steel cable.  The shelves can be loosened from the channel by loosening two bolts, and can then slide freely.  If there's no weight on the shelf, it's easy to move by hand.  But the hoist is powerful enough to lift me, sitting on the shelf.


Here's a video of the first hoist of the brew session; bringing the HLT up to the height needed for sparging:


And a short clip of sparging with the structure:


And finally, hoisting the kettle at the end of the boil (at this point I've cleaned the HLT and Mash Tun and they're out drying in the sun):


And now the kettle is high enough to run off through the wort chiller into the fermenter:

And we're done!